Crispy Panko Chicken Recipe (Easy Chicken Cutlets)
I’m finally sharing my top secret Crispy Panko Chicken recipe! These are hands down the crispiest chicken cutlets you’ll ever make! These breaded chicken breasts are fried till golden brown and are moist and juicy on the inside. If you’re looking for more easy dinner recipes, I have plenty for you to try! Either way, I know the whole family will love these panko chicken breasts.
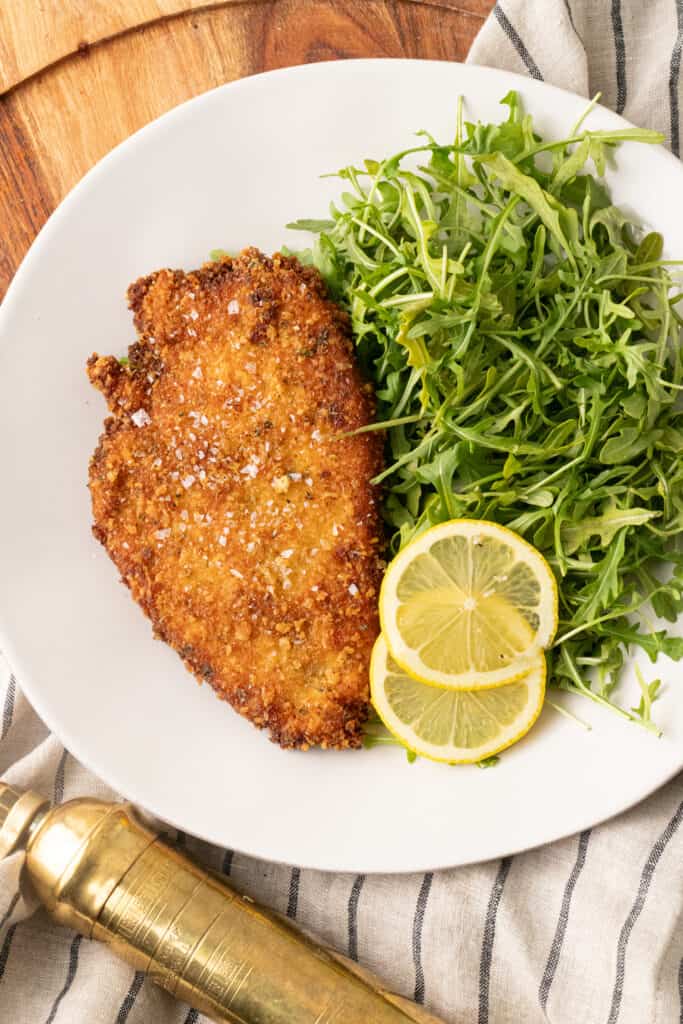
The secret to these perfectly crispy panko-breaded chicken cutlets is how I bread them and the perfect ratio of traditional breadcrumbs to panko breadcrumbs to parmesan cheese. The result? Tender juicy chicken with a crispy crust. Each layer is also perfectly seasoned with garlic powder, Italian seasoning, salt, and pepper.
If you’re looking for a recipe that you can batch at the beginning of the week to transform many different meals, this easy recipe is a great option! You can pull these breaded cutlets out of the fridge and reheat them in the oven on a busy night for a delicious homemade meal – perfect for meal prep! This delicious crispy panko chicken is one of my favorite easy chicken recipes. These cutlets are so tasty, that you can eat them plain or with just a little lemon juice! I love to enjoy these chicken cutlets with Dijon mustard or a home made honey mustard – yum!
If you’re a fan of classic Italian recipes, I have lots more to offer! Some of my favorites are my Aperol Margarita, Cacio e Pepe Risotto, and Gnocchi Bolognese.
Table of Contents
Why You’ll Love This Panko Chicken Recipe
- This is perfect for meal prep – Meal prep is a game-changer for busy folks, and these crispy panko chicken cutlets are a meal prep dream! They’re easy to make in bulk and store well in the fridge or freezer. Having a batch ready to go means you’re just a quick reheat away from a satisfying meal any day of the week.
- This panko chicken recipe is versatile – One recipe, endless possibilities! Whether you’re in the mood for classic chicken tenders, a fancy chicken Milanese, or want to amp up your salads and sandwiches, these cutlets have got you covered. The crunchy panko coating provides the perfect canvas for whatever you crave. Plus, this recipe makes the perfect base for chicken parmesan!
- It’s a family-friendly winner – It’s a universal truth that crispy chicken cutlets are a hit with all ages. From picky eaters to discerning foodies, everyone can agree that these golden-brown delights are irresistible.
Ingredients
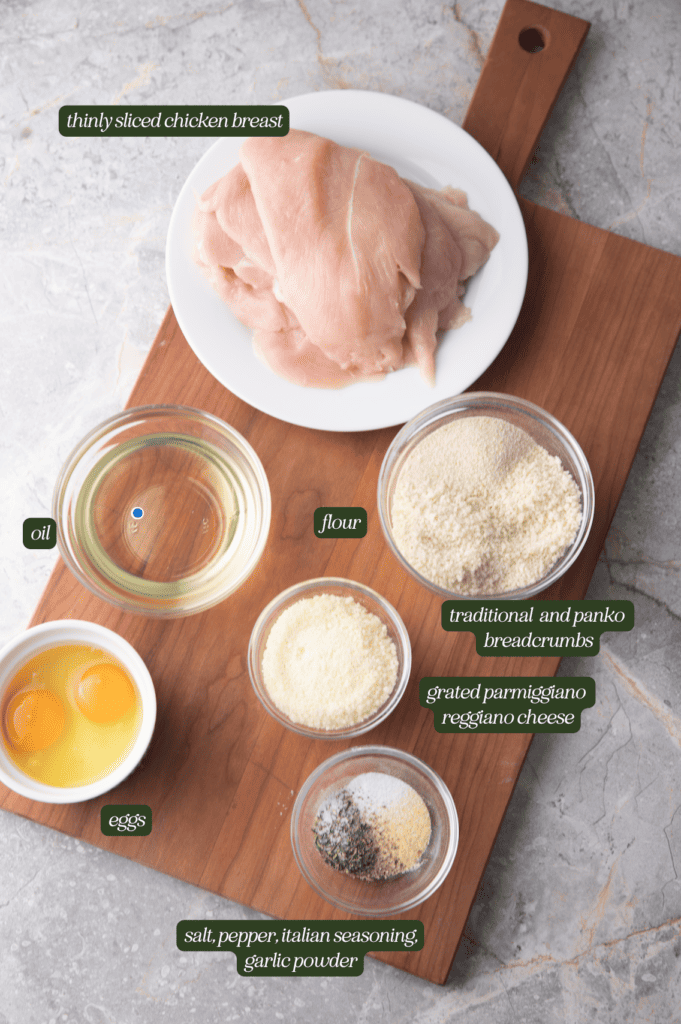
- Chicken breasts – The star of the show! Chicken breasts provide a lean and versatile base for this panko chicken recipe.
- Italian seasoning blend – This is my favorite blend of herbs and it really pumps up the flavor profile with a harmonious blend of herbs and spices. If you don’t have pre-made Italian seasoning, you can make your own blend using dried herbs like basil, oregano, thyme, and rosemary.
- All-purpose flour – Creates a sturdy base for the breading to adhere to the chicken. Remember to shake off excess flour before dipping the chicken in the egg mixture to prevent clumps in the breading.
- Eggs – Fresh eggs act as a binder, helping the breading adhere to the chicken and creating a crispy coating. Beat the eggs well and consider adding a splash of milk for extra richness.
- Panko breadcrumbs – Japanese breadcrumbs (panko) are the secret to achieving that irresistible crispy texture. Press the breadcrumbs firmly onto the chicken to ensure even coating and maximum crunchiness.
- Traditional breadcrumbs – These regular breadcrumbs add an extra layer of texture and helps the panko adhere to the chicken.
- Grated parmesan cheese – Provides a nutty and savory flavor to the breading. Opt for freshly grated Parmesan for superior flavor and texture.
- Oil for frying – The proper oil (with a high smoke point) is essential for achieving that golden-brown crispiness. Heat the oil to the right temperature (around 350°Fahrenheit (175°Celsius) to ensure perfectly cooked chicken without excess greasiness.
- Flaky sea salt for finishing – Although optional, flaky sea salt adds a final touch of texture and flavor. Sprinkle flaky sea salt over the hot chicken cutlets just before serving to enhance the flavors and add a satisfying crunch.
Substitutions
- Oil substitutions – Instead of canola, avocado, or vegetable oil for frying, you can use other high-heat oils like peanut or sunflower. Alternatively, you can bake the chicken cutlets in the oven for a healthier cooking method.
- Spice it up – Add a pinch of cayenne pepper or paprika to the breading mixture for a hint of heat and extra flavor. For a unique twist, you can also incorporate other spices like smoked paprika, chili powder, or cumin.
- Extra crunchy coating – For an extra crispy coating, mix in some crushed cornflakes or potato chips with the panko breadcrumbs. This adds layer of crunchiness and flavor to the chicken cutlets.
- Use chicken thighs instead – You could also use this panko chicken recipe with boneless skinless chicken thighs! Please note, cooking time may vary.
Step by Step Instructions
Step 1: Slice each chicken breast in half horizontally to create two thinner pieces. Season both sides of each chicken piece with salt, pepper, garlic powder, and an Italian seasoning blend. Set aside.
Prepare the breading station in three separate shallow bowls…
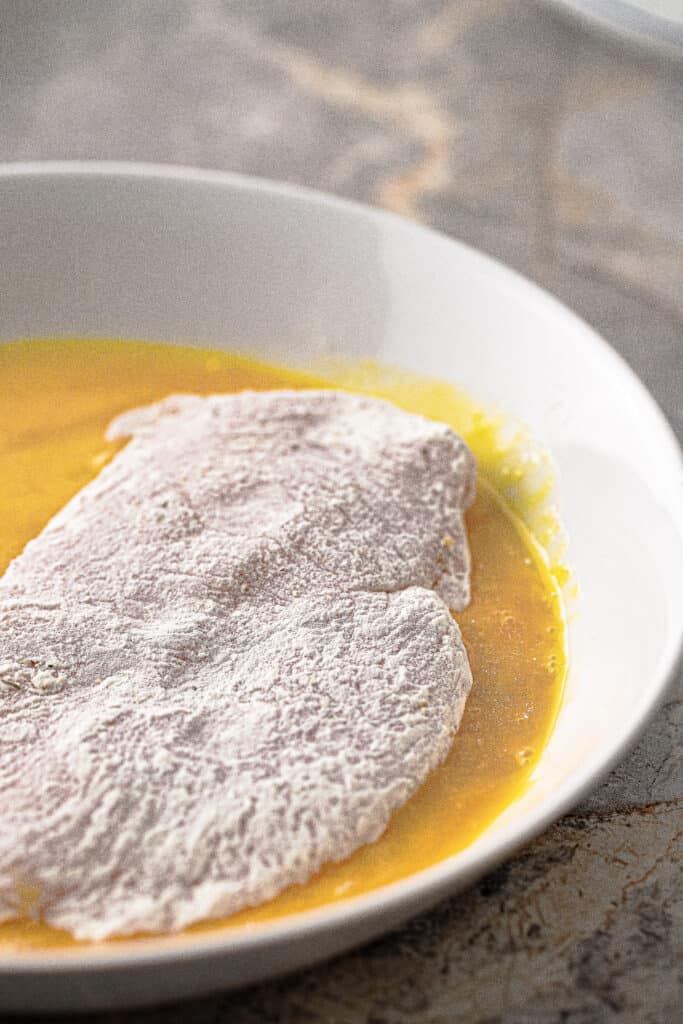
Step 2: Dredge each seasoned chicken piece in the flour mixture, shaking off any excess flour.
Dip the flour-coated chicken into the beaten eggs, ensuring it is fully coated.
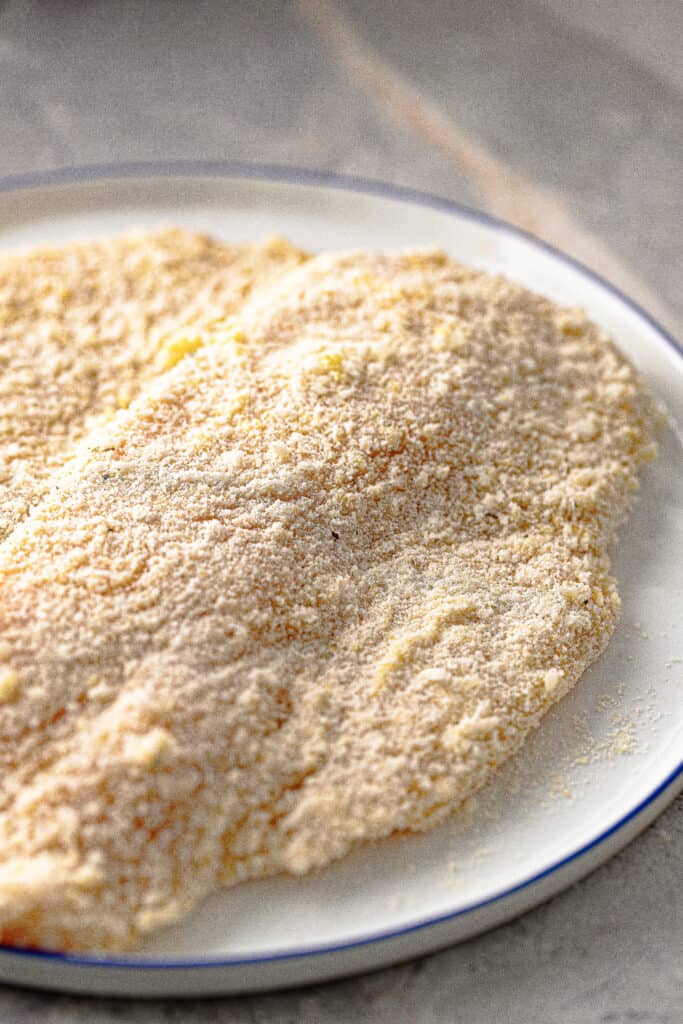
Coat the chicken thoroughly with the seasoned breadcrumb mixture, pressing gently to adhere the crumbs to the chicken. Repeat with the remain

Step 3: In a large skillet, heat oil over medium-high heat until hot but not smoking. You can test the oil’s readiness by dropping a small piece of breadcrumb into it; it should sizzle immediately.
Carefully place 1-2 breaded chicken cutlets in the hot oil, making sure not to overcrowd the pan. Frying fewer cutlets at a time ensures they cook evenly and maintain their crispy texture.
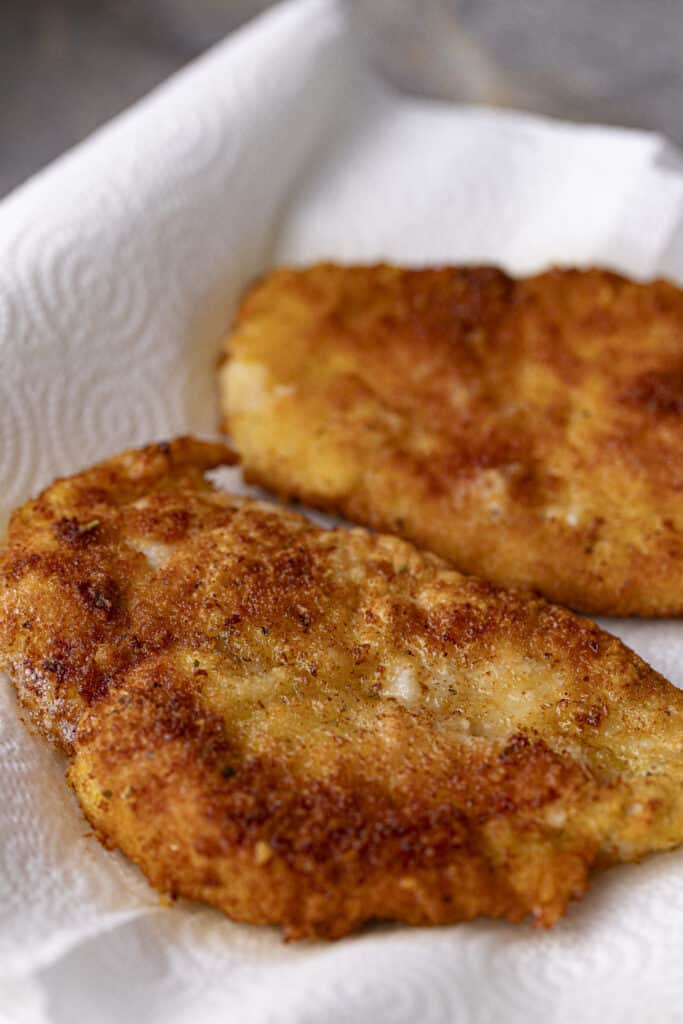
Step 4: Fry the chicken for about 3-4 minutes on each side, or until golden brown and cooked through. The internal temperature of the chicken should reach 165°Fahrenheit (75°Celsius). Adjust the heat as needed to maintain a consistent temperature and prevent burning.
Once cooked, transfer the chicken cutlets to a plate lined with paper towels to drain any excess oil. Sprinkle with flaky sea salt for an extra burst of flavor.

Tips and Notes
- Properly season each layer – Seasoning is key to building flavor in this panko-coated chicken breast recipe. Make sure to generously season each layer of the breading process, including the flour, eggs, and breadcrumb mixture. This ensures that every bite is packed with delicious flavor.
- Maintaining the oil temperature – Consistently hot oil is crucial for achieving perfectly crispy chicken cutlets. Keep an eye on the temperature of the oil and adjust the heat as needed to maintain it around 350° Fahrenheit (175°Celsius).
- Frying the cutlets at the right temperature ensures they cook evenly and develop a golden-brown crust without becoming greasy.
- Frying in batches – While it may be tempting to fry all the chicken cutlets at once, it’s essential to fry them in batches, cooking only 1-2 cutlets at a time. Frying fewer cutlets at once prevents overcrowding in the skillet, allowing each cutlet to cook evenly and maintain its crispy texture. Overcrowding the skillet can result in uneven cooking and soggy breading.
Recipe FAQs

Serving Suggestions
- Wine pairing – For a versatile wine that pairs well with a variety of serving suggestions, consider a light-bodied and fruity Pinot Noir. This red wine offers notes of cherry, raspberry, and earthiness, which complement the flavors of the crispy chicken cutlets without overwhelming them. Its smooth tannins and balanced acidity make it an excellent choice for a casual meal or special occasion.
- Classic chicken sandwich – Serve the crispy panko chicken cutlets between two slices of soft bread or on a toasted bun with your favorite condiments like mayonnaise, lettuce, tomato, and pickles. Pair this classic sandwich with a refreshing glass of Sauvignon Blanc. The wine’s crisp acidity and citrus notes complement the crispy chicken and add a bright contrast to the flavors.
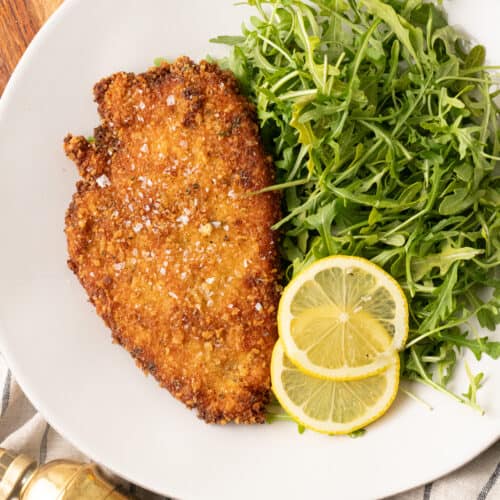
- Chicken Milanese – Top the crispy cutlets with a fresh arugula salad dressed with lemon vinaigrette and shaved Parmigiano Reggiano cheese. Serve alongside roasted potatoes or a simple pasta dish. Pair this dish with a light-bodied Pinot Grigio. The wine’s subtle fruitiness and clean finish enhance the flavors of the chicken and salad without overpowering them.
- Chicken caesar salad – Slice the crispy chicken and arrange them on top of a bed of crisp romaine lettuce tossed with Caesar dressing, croutons, and grated Parmigiano Reggiano cheese. Serve with extra dressing on the side. Pair this classic salad with a glass of Chardonnay. The wine’s creamy texture and notes of citrus and oak complement the richness of the Caesar dressing and add depth to the dish.
- Chicken and waffles – Enjoy a comforting brunch or dinner by pairing this panic chicken recipe with fluffy Belgian waffles and drizzling them with maple syrup. Add a side of scrambled eggs or a fresh fruit salad for balance. Pair this sweet and savory dish with a sparkling Prosecco. The wine’s effervescence and crisp acidity cleanse the palate between bites.
Storage and Reheating Instructions
Storage
- Refrigerator storage – Allow the cooked chicken cutlets to cool to room temperature. Once cooled, transfer them to an airtight container or wrap them tightly in plastic wrap. Store the chicken cutlets in the refrigerator for up to 3-4 days.
- Freezer storage – If you want to store the chicken cutlets for a more extended period, you can freeze them. Allow the cooked chicken cutlets to cool completely to room temperature. Once cooled, place them on a baking sheet lined with parchment paper and flash-freeze them for about 1-2 hours until they are firm. Then, transfer the frozen chicken cutlets to a freezer-safe bag or container, placing parchment paper between each layer to prevent sticking. Properly stored, the chicken cutlets can be frozen for up to 2-3 months.
Reheating
- Refrigerated chicken cutlets – To reheat refrigerated chicken cutlets, preheat your oven to 350°Fahrenheit (175°Celsius). Place the chicken cutlets on a baking sheet and cover them loosely with aluminum foil to prevent them from drying out. Bake for about 10-15 minutes or until heated through. You can remove the foil during the last few minutes of baking for extra crispiness.
- Frozen chicken cutlets – If reheating frozen chicken cutlets, preheat your oven to 375°Fahrenheit(190°Celsius). Place the frozen chicken cutlets on a baking sheet and cover them loosely with aluminum foil. Bake for about 20-25 minutes, flipping halfway through or until heated through and crispy. Allow the chicken cutlets to thaw in the refrigerator overnight before reheating for best results.
Did you make this recipe? We’d love to see it! Tag @seasonedandsalted on Instagram & leave a ⭐️⭐️⭐️⭐️⭐️ review below!
Crispy Panko Chicken Recipe (Easy Chicken Cutlets)
Equipment
- Skillet or frying pan
- Shallow bowls (for breading station)
- tongs
- Paper towels
- Baking sheet (for baking option, if desired)
Ingredients
- 4 chicken breasts
- 2 teaspoons salt
- 2 teaspoons black pepper
- 1 tablespoon garlic powder
- 1 tablespoon Italian seasoning blend
- 1 1/2 cups All-purpose flour
- 2 Eggs
- 1 cup panko breadcrumbs
- 1 cup traditional breadcrumbs
- 3 tablespoons Grated Parmesan cheese optional
- Oil for frying canola, vegetable, or avocado
- Flaky sea salt for finishing
Instructions
Prepare the Chicken
- Slice each chicken breast in half horizontally to create two thinner pieces. Season both sides of each chicken piece with salt, pepper, garlic powder, and Italian seasoning blend. Set aside.
Set Up Breading Station:
- Prepare the breading station in three separate shallow bowls. In each shallow dish or bowl, place the all-purpose flour seasoned with salt, pepper, garlic powder, and Italian seasoning blend.
- In the second bowl, crack the eggs and lightly beat them. Season the eggs with salt, black pepper, garlic powder, and Italian seasoning blend.
- In the third bowl, combine the panko breadcrumbs, traditional breadcrumbs, and grated Parmesan cheese (if using). Season the mixture with salt, pepper, garlic powder, and Italian seasoning blend. Mix well to distribute the seasonings evenly.
Bread the Chicken
- Dredge each seasoned chicken piece in the flour mixture, shaking off any excess flour.
- Dip the flour-coated chicken into the beaten eggs, ensuring it is fully coated.
- Coat the chicken thoroughly with the seasoned breadcrumb mixture, pressing gently to adhere the crumbs to the chicken. Repeat with the remaining chicken pieces. Make sure to do this before heating the oil. You want your breaded chicken to rest before frying so that the breading as time to adhere perfectly.
Fry the Chicken
- In a large skillet, heat oil over medium-high heat until hot but not smoking. You can test the oil's readiness by dropping a small piece of breadcrumb into it; it should sizzle immediately.
- Carefully place 1-2 breaded chicken cutlets in the hot oil, making sure not to overcrowd the pan. Frying fewer cutlets at a time ensures they cook evenly and maintain their crispy texture.
- Fry the chicken for about 3-4 minutes on each side, or until golden brown and cooked through. The internal temperature of the chicken should reach 165°Farenheit (75°Celsius). Adjust the heat as needed to maintain a consistent temperature and prevent burning.
- Once cooked, transfer the chicken cutlets to a plate lined with paper towels to drain any excess oil. Sprinkle with flaky sea salt for an extra burst of flavor.
- Repeat the frying process with the remaining breaded chicken cutlets, frying 1-2 at a time, until all cutlets are cooked.
Notes
- Properly seasoning each layer of the breading process is crucial for maximizing flavor.
- Consistently hot oil is essential for achieving perfectly crispy chicken cutlets.
- Frying the chicken cutlets in batches ensures even cooking and maintains their crispy texture.

I’ll never make my cutlets the old way again! These were so crispy and juicy.
whoop whoop
Thank you, cousin!!!!
Literally so good and easy!!!! I made a bunch and ate them on chicken Cesar wraps and in salads for work lunches!!!
Delicious!!! Love the flavor.
Amazing! So crispy and juicy!